Sunday, March 1, 2009

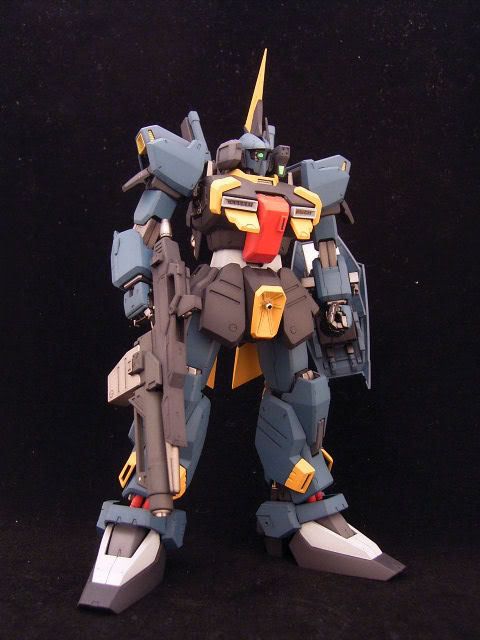
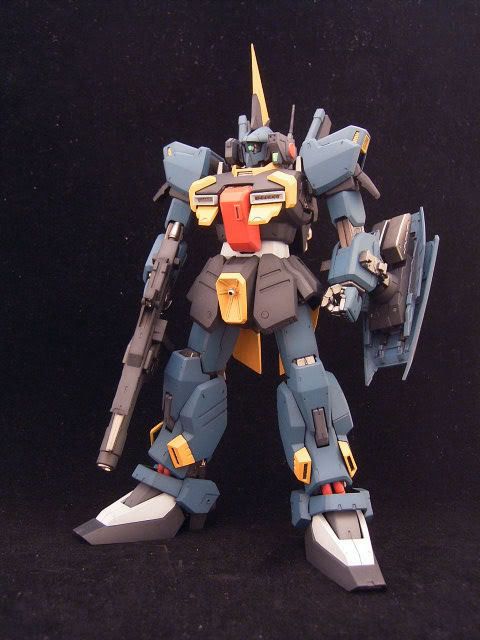
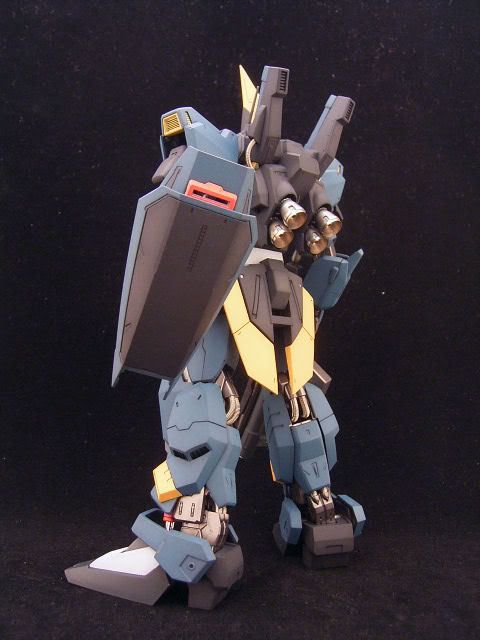
Barzam Sentinel Version


Finally, an update on this conversion that I have been waiting for almost a year now. blogger-emoticon.blogspot.com

According to my supplier this kit is near completion and should be released on May.


The base kit needed for conversion will be a 1/100 MG RX-178 MkII Gundam ver. 2.0 and is sold separately.


Hmm, an optional grenade launcher for the beam rifle can be used as seen on the images.blogger-emoticon.blogspot.com


Hopefully, the quality of the plastic will be better this timeblogger-emoticon.blogspot.com

Tuesday, February 24, 2009

Borderline

blogger-emoticon.blogspot.comblogger-emoticon.blogspot.comblogger-emoticon.blogspot.com


Eureka!!! After relentlessly going through each line of the code I finally found the parameters to remove the borders. blogger-emoticon.blogspot.com


I am contented for now. blogger-emoticon.blogspot.com

Borderline

blogger-emoticon.blogspot.comblogger-emoticon.blogspot.comblogger-emoticon.blogspot.com


Today I have managed to install emoticons for my blog to liven it up a bit, hehe. Though, I am unable to remove the borders. I followed the instructions to the letter, but still the borders are visible.blogger-emoticon.blogspot.com


Oh well, I guess this will do for the time being.blogger-emoticon.blogspot.com

DIY Spray Booth


Aside from using CA glue for the acrylic sheets, I also used wood screws to attach the panels together as can be seen in the images. The second image shows the profile from the rear where the duct fan will be mounted.

Only a few parts to add and this spray booth will be good to go.blogger-emoticon.blogspot.com


I will set this aside for the joints to "cure" first before proceeding to the next step which is to mount the duct fan and the flexible hose. blogger-emoticon.blogspot.com

Wednesday, February 18, 2009

DIY Spray Booth

Whew! Its been a while since my last post, hehe. Quite a busy first quarter of 2009 for me. Anyway, my spray booth is almost finished and here are some progress pics for this project:


Above is the duct fan that I will be installing to the spray booth. It costs around P500 to P700 these days, not too small but not too big.blogger-emoticon.blogspot.com


Here, I cut the edge of the rear panel at an angle to form a miter joint with the left and right acrylic panels to achieve the desired shape.


After making the necessary measurements, I cut the inside of the rear panel where the duct fan will be attached.


Time to assemble the panels, hehe. Using a variety of tools (electric drill, jigsaw, screwdriver) I was able to put all the pieces together. Making the acrylic sheets meet was the tricky part, hehe. Here I cut thin strips to reinforce the joints and used CA (CyanoAcrylic) glue, common brand is Mighty Bond and eventually all the parts were joined.


I have thought of adding angular aluminum sheets to reinforce the joint between the rear and bottom panel before attaching the duct fan, just to be sure.blogger-emoticon.blogspot.com

Wednesday, January 14, 2009

DIY Spray Booth


A quick update on my spray booth project. I did a mock up for the wood panels to see if the dimensions are okay.

The next image shows the rear panel after cutting the hole for the exhaust fan that I will be using.

Tuesday, December 23, 2008

DIY Spray Booth


I am currently building a spray booth to replace the cardboard box that I have been using for several years now. The materials that I will be using are scrap plywood and acrylic sheets laying around the house, as seen above.


After making the necessary measurements and cutting the plywood into several panels using a portable jigsaw, I tried fitting the rear and bottom panel.